


If you love the "blur up" placeholder effect when you see images loading on Medium or Gatsby sites and you've been just dying to figure out how they work, this article is for you!
The general concept behind the effect is to load in a very small version of the original image which loads extremely quickly, stretch it out, blur it, then lay it over the top of where the original image will go. Once the full size image is done loading, it replaces the blurry placeholder. This helps improve the user experience, both by preventing content from jumping when an image loads (also known as layout shift), and to provide some indication of what will go there when it loads rather than just showing an empty spot on the page.
How to Create Blurred Placeholder Images for Static Sites
There are a few different ways to go about this. To prevent layout shift, all we really need to do is set the width and height of an image, which allows the browser to allocate the necessary space between content before the image is loaded. However, the only way to load a small placeholder image is to serve a resized version along with the original image.
So how do we do this for a static site? Next.js now has an excellent built-in <Image /> component, which abstracts away image resizing and optimization. This is not a static feature, though, since the optimization works on the server side. If you want to keep your site completely static, but have a placeholder image ready to go when the page first loads, you need to create the placeholder during your static site's build process. This is the approach that the gatsby-image Gatsby plugin uses, and it is what we will emulate for our Next.js site.
At build time, gatsby-image generates several versions of different sizes for each image. Depending on the size of the screen loading your site, the optimally sized version of your image will be loaded and displayed. While it is loading, a tiny version of the image of around 20 pixels in width is loaded and displayed. In fact, the image is so tiny, it can conveniently be represented as a short base64 encoded string just a few bytes in size, so it loads instantly along with the rest of your content.
One trade-off with gatsby-image is that if you have a website with a massive amount of images, the build time is bogged down substantially by this image transformation process. This is actually the problem that Next.js resolves by doing its <Image /> component transformations server-side. But again, the trade-off is that your site is no longer fully static.
Depending on your needs, one possible compromise is to generate only 1 transformation of each of your images at build time - the one that produces the tiny placeholder image. This greatly reduces the image processing time during our builds, and it's what we will do.
Create a Base64 Encoded String for yor Images
The first step is to generate the small placeholder images we will need for all the images our site will use. We can create a node script that will process each image at build time. An excellent Node.js library that we can use for our purposes is sharp, which is what gatsby-image uses under the hood as well.
Start by generating a Next.js app. We can use the with-mdx-remote example template as our base to minimize boilerplate, and install the sharp package.
$ npx create-next-app -e with-mdx-remote
$ npm i sharp
Create a process-images.js file in your root folder and add a test-image.png to your public folder.
const path = require('path');
const sharp = require('sharp');
const fs = require('fs');

async function processImage(imagePath) {
  const sharpImg = sharp(imagePath);
  const meta = await sharpImg.metadata();
  const placeholderImgWidth = 20;
  const imgAspectRatio = meta.width / meta.height;
  const placeholderImgHeight = Math.round(placeholderImgWidth / imgAspectRatio);
  const imgBase64 = await sharpImg
    .resize(placeholderImgWidth, placeholderImgHeight)
    .toBuffer()
    .then(
      buffer => `data:image/${meta.format};base64,${buffer.toString('base64')}`
    );

  return {
    fileName: path.basename(imagePath),
    // Strip public prefix, /public is / in Nextjs runtime environment
    relativePath: path
      .relative(process.cwd(), imagePath)
      .substring('public'.length),
    width: meta.width,
    height: meta.height,
    imgBase64
  };
}

processImage('public/test-image.png').then(meta => {
  fs.writeFileSync('public/test-img-meta.json', JSON.stringify(meta));
});
Once sharp loads our image, we can extract it's width and height from the metadata. We can use the aspect ratio to calculate the height of the resized placeholder images from our desired width. Once we have our dimensions, we pass them to sharp's resize function and get a buffer from the result.
Using this buffer, we can simply use its toString('base64') method to represent the image data as a base64 encoded string. We can embed our image using this base64 string directly inline in our HTML using the data url scheme: data:[<mediatype>][;base64],<data>. Since sharp's metadata also provides the media type, we have all we need!
Now that we have all the image metadata we need, let's try embedding the base64 string directly into the HTML of our home page and see what happens.
//...
export default function Index({ posts, imgMeta }) {
  return (
    <Layout>
      <h1>Home Page</h1>
      <img src={imgMeta.imgBase64} />
      {/* ... */}
    </Layout>
  );
}

export function getStaticProps() {
  //...
  const imgMeta = JSON.parse(
    fs.readFileSync('public/test-img-meta.json', 'utf-8')
  );

  return { props: { posts, imgMeta } };
}
Great! The browser now renders our image, which is entirely encoded in string just a few hundred characters long. However...

The image is positively miniscule!! 🧐
Creating an Image Blurring Component to Handle Loading
To use this image as a placeholder for the full size image, we need to stretch it to fit over the top of the full sized image, then make it disappear after the full image loads.
Just stretching the tiny placeholder image makes it very pixelated and unattractive. However, all we need is a general approximation of the content and colors, so we can apply a heavy CSS blur filter. Let's create a <BlurImage /> component that takes care of all this logic for us and provides a simple API.
import React, { useState } from 'react';

export default function BlurImage({
  relativePath,
  width,
  height,
  imgBase64,
  alt
}) {
  const [isLoaded, setLoaded] = useState(false);

  return (
    <div
      style={{
        position: 'relative',
        overflow: 'hidden'
      }}
    >
      <img
        aria-hidden="true"
        src={imgBase64}
        style={{
          position: 'absolute',
          top: '0px',
          right: '0px',
          bottom: '0px',
          left: '0px',
          width: '100%',
          height: '100%',
          objectFit: 'cover',
          objectPosition: 'center',
          filter: 'blur(2rem)',
          transform: 'scale(1.2)',
          opacity: isLoaded ? '0' : '1',
          transition: 'opacity 0s ease',
          transitionDelay: '300ms'
        }}
      />
      <img
        src={relativePath}
        width={width}
        height={height}
        onLoad={() => setLoaded(true)}
        alt={alt ? alt : ''}
        style={{
          maxWidth: '100%',
          height: 'auto',
          opacity: isLoaded ? '1' : '0',
          transition: 'opacity 300ms ease'
        }}
        loading="lazy"
      />
    </div>
  );
}
We've got two image components wrapped in one div. The first one uses our base64 string to load in immediately, and is stretched to fit the container of the full image and blurred. The second is the full image. We load the image from our /images folder by its path, which we saved to the JSON file during our image processing step.
We keep a loaded state which is initially set to false, which our full image's img flips in its onLoad event. Once isLoaded is true, we simply flip the opacity of either image and apply a transition to make it look nice. Now the full image is visible, and the blurred placeholder has an opacity of 0.
Let's use our new component in our page.
//...
export default function Index({ posts, imgMeta }) {
  return (
    <Layout>
      <h1>Home Page</h1>
      <BlurImage alt="Gray cat" {...imgMeta} />
      {/* ... */}
    </Layout>
  );
}

export function getStaticProps() {
  //...
  const imgMeta = JSON.parse(
    fs.readFileSync('public/test-img-meta.json', 'utf-8')
  );

  return { props: { posts, imgMeta } };
}
One other really nice bonus convenience we've obtained in preprocessing our images is we already know the image's width and height. You'll recall that we discussed the importance of putting a width and height for each image to prevent layout shift and preserve the aspect ratio on resize. However, it is fairly tedious to do this for every image on your site. With our image meta, it's as easy as spreading the metadata into our new component's props! You can pass any additional properties for an image, such as alt down through to your full sized img separately.
This is great, but how do we manage this in the real world, when you have more than one image in your site?!
Extending Image Processing to your Whole Site
Technically, we can dump all of our images into our public folder and just process every image in the folder. However, then every route would have a ton of metadata passed to the client that it never needs. A good approach here is to process images that multiple routes will use in the base folder, and separate images only used in specific routes by route.
We'll create an images subfolder in public, then a folder for each route. We'll create a page-2.js so we can demonstrate this. We'll leave our original image as a shared image, and add 2 route-specific images. Your public folder should look like this:
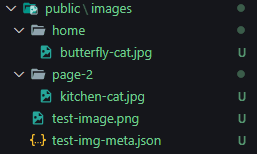
Note the convention of naming the folders for route-specific images the same as the name of the route will be (page-2). This will simplify knowing which images we should get the meta for in each route.
//...
async function processImages(folderName, recrusive) {
  const imageFolder = fs.readdirSync(folderName);

  const recurseFolders = [];
  const folderImgMeta = {};

  for await (const item of imageFolder) {
    const itemIsDir = fs.lstatSync(path.join(folderName, item)).isDirectory();
    if (itemIsDir) {
      recurseFolders.push(path.join(folderName, item));
    } else if (path.extname(item) !== '.json') {
      const imgMeta = await processImage(path.join(folderName, item));
      folderImgMeta[imgMeta.fileName] = imgMeta;
    }
  }

  fs.writeFileSync(
    path.join(folderName, 'imgMeta.json'),
    JSON.stringify(folderImgMeta)
  );

  if (recrusive)
    recurseFolders.forEach(async folder => await processImages(folder, true));

  return;
}

async function processAllImages() {
  await processImages(path.join(process.cwd(), 'public', 'images'), true);
}

processAllImages();
Running this script will now go through every folder in your public/images folder and create an imgMeta.json, which contains the image metadata for all the images in that folder. Note that this function is recursive, so you can nest folders if you're created nested routes. Each JSON file is a hash map that contains the metadata for each image, accessible by its file name.
We can simplify the retrieval of this metadata in our routes by creating an API for it.
import fs from 'fs';
import { join } from 'path';

/**
 * @param route The route path, excluding base path, without leading or trailing slashes. E.g. test/page or page
 * @param includeSharedImages Whether the images in the base images folder should be included
 */
export async function getRouteImageMeta(route, includeSharedImages) {
  const routeImgPath = join(
    process.cwd(),
    'public',
    'images',
    route === '' ? 'home' : route,
    'imgMeta.json'
  );

  const routeImgMeta = JSON.parse(fs.readFileSync(routeImgPath, 'utf-8'));

  if (includeSharedImages) {
    const sharedImgMeta = JSON.parse(
      fs.readFileSync(
        join(process.cwd(), 'public', 'images', 'imgMeta.json'),
        'utf-8'
      )
    );
    return { ...sharedImgMeta, ...routeImgMeta };
  }

  return routeImgMeta;
}
We retrieve the appropriate metadata file based on the route we are in, and we optionally combine it with the "shared" images in the base public/images folder if we need some of the images there.
Now let's use the this API in our routes.
//...
export default function Index({ posts, imgMeta }) {
  return (
    <Layout>
      <h1>Home Page</h1>
      <BlurImage alt="Gray cat" {...imgMeta['test-image.png']} />
      <BlurImage alt="Butterfly cat" {...imgMeta['butterfly-cat.jpg']} />
      {/* ... */}
    </Layout>
  );
}

export function getStaticProps() {
  //...
  const imgMeta = await getRouteImageMeta('', true);

  return { props: { posts, imgMeta } };
}import BlurImage from '../components/blur-image';
import Layout from '../components/Layout';
import { getRouteImageMeta } from '../utils/image-api';
export default function Index({ imgMeta }) {
return (
<Layout>
<h1>Page 2</h1>
<BlurImage alt="Gray cat" {...imgMeta['test-image.png']} />
<BlurImage alt="Kitchen cat" {...imgMeta['kitchen-cat.jpg']} />
</Layout>
);
}
export async function getStaticProps() {
return { props: { imgMeta: await getRouteImageMeta('page-2', true) } };
}Now that we've got our image API nicely abstracted, reusing it in our routes is very simple. We just pass in the name of the current route and whether we need to include shared images. The only change to the actual JSX now that we have multiple images to work with is that we need to access the desired image with its file name, which we used as the key in our image metadata hash map.
Using Image Blurring Component in Markdown with a Custom Remark Plugin
This all works great, but how can we leverage our nice image blur component in markdown files?
This is where MDX comes in very handy. We can actually create a markdown remark plugin that can look through the images we have in our markdown and replace them with instances of our blur image component.
Normally, in MDX (or markdown, if you're using plain HTML), you would simply pass in your desired attributes right within the markdown file. However, we want to retain all the ergonomics we gained by having all the metadata we need in a JSON file. Why pass in the image path, width, height, etc, when all that information was automatically cached at build time? Luckily, we can use our plugin to dynamically insert our metadata at build time, so when we write posts, we don't need to worry about any of it!
In example-post.mdx, just add the following to the MDX:
And here is our blur image component:
Note we're using a relative path reference, but our image is not in the same folder as our MDX file.
//...
import visit from 'unist-util-visit';
import BlurImage from '../../components/blur-image';

const components = {
  //...
  BlurImage: BlurImage
};

export default function PostPage({ source, frontMatter }) {
  //...
}

export const getStaticProps = async ({ params }) => {
  const postFilePath = path.join(POSTS_PATH, `${params.slug}.mdx`);
  const source = fs.readFileSync(postFilePath);

  const { content, data } = matter(source);

  const imgMeta = await getRouteImageMeta(
    path.join('posts', params.slug),
    false
  );

  const mdxSource = await renderToString(content, {
    components,
    // Optionally pass remark/rehype plugins
    mdxOptions: {
      remarkPlugins: [
        function() {
          return transformer;

          function transformer(tree) {
            visit(tree, 'image', visitor);

            function visitor(node) {
              if (!imgMeta) return;
              const meta = imgMeta[node.url.split('./')[1]];

              node.type = 'jsx';
              node.value = `<BlurImage
                              fileName="${meta.fileName}"
                              relativePath="${meta.relativePath}"
                              width={${meta.width}}
                              height={${meta.height}}
                              imgBase64="${meta.imgBase64}" />`;
            }
          }
        }
      ],
      rehypePlugins: []
    },
    scope: data
  });

  return {
    props: {
      source: mdxSource,
      frontMatter: data
    }
  };
};

export const getStaticPaths = async () => {
  //...
};
First, we pull in the image metadata for the images we are using in our post, as before.
Next, we've created our own custom markdown plugin. After our MDX file is processed and transformed into an AST (Abstract Syntax Tree), we are left with a tree of nodes. Each node contains some information about the node, and its value.
Here we're looking for any nodes of type image, then extracting the image's file name. Image nodes have a url field, parsed from the markdown, which contains this information. Using this information, we grab the appropriate image metadata from our hash map. Now, we have all we need to construct the JSX for our BlurImage component. We can just overwrite the existing image node's type to be JSX, and replace the value to be a string value of our component with all the properties filled out.
Conclusion
And we're done! Now, we have a simple tool which greatly improves the ergonomics of working with images in our website, creates blurry placeholder images while the full size image loads, and we have an easy way to use it within our markdown as well thanks to MDX.
If you want to make sure the images are processed automatically, you can prepend instructions to run it before your build process in your NPM scripts.
"scripts": {
  "dev": "npm run process-images && next",
  "build": "npm run process-images && next build",
  "process-images": "node process-images.js"
}
This will reprocess all of your images each time you restart the dev server or rebuild. Optionally, while developing, you can simply run $ node process-images separately any time you add images, that way it doesn't run each time even when you haven't changed your images.
You can find the final version of this project in its repo: nextjs-blur-image.
Happy blurring!